Welcome to the exciting world of PlayStation 3 emulation on your Steam Deck! Unlock the ability to play your favorite PS3 titles seamlessly on the powerful handheld gaming device. Our step-by-step guides and tutorials will walk you through the process of setting up the emulator, configuring settings, and optimizing your gaming experience.
The first thing you must do is install Emudeck. You can download Emudeck by opening Firefox---the default browser in SteamOS, but you can use any browser installed on your Deck---and visit EmuDeck.com. Once the website loads hit the "Download" button located on the upper right side of the front page.
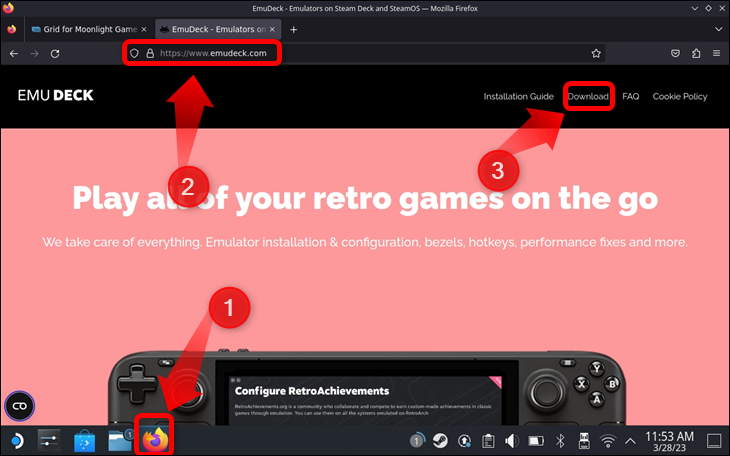
Once you're on the download section, click the "Download Installer" button and wait for the download to finish. Firefox will save the EmuDeck installation file in your "Downloads" folder.
Now, in order to install EmuDeck, you have to move the installation to your desktop. This is a mandatory step needed for EmuDeck to work properly. To move the installer to your desktop, open Dolphin, the default file manager app on SteamOS, and click on the "Downloads" tab located on the left side by pressing the right trigger or the right touchpad. Once inside the "Downloads" folder, locate the EmuDeck installation---the file titled "EmuDeck.desktop"---and right-click it by pressing the left trigger on your Steam Deck. Once you're greeted with the right-click menu, click the "Cut" option.
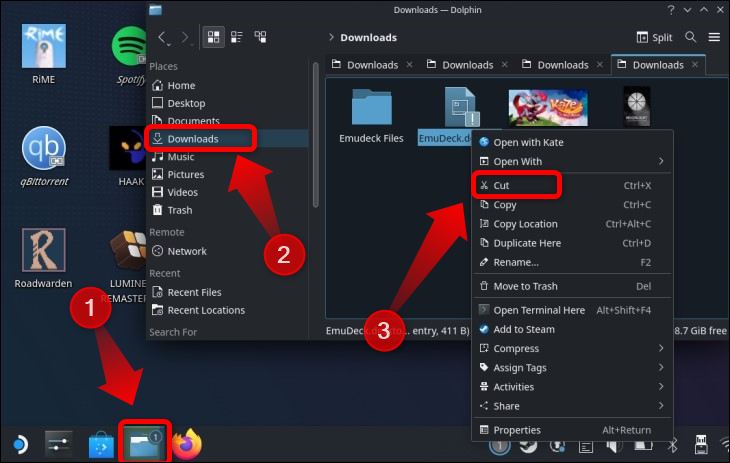
You can now minimize Dolphin and go to the desktop. Once on the desktop, right-click on any part of it not covered by icons and then click the "Paste One File" option.

Once you move the installation to the desktop, double-click the "Install EmuDeck" icon and click "Continue" when prompted.
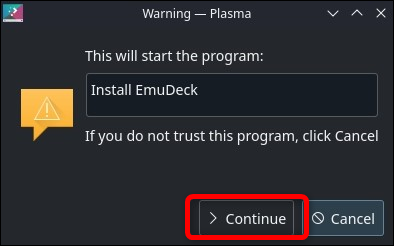
The installer will download files, open a terminal Konsole window, download updates, and install EmuDeck.
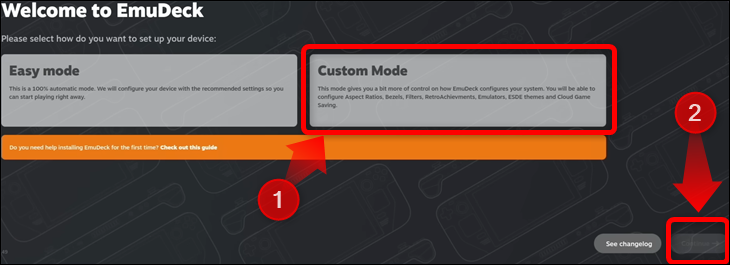
Once the installation finishes, you'll be greeted with the welcome screen showing two ways to set up your device: "Easy Mode" and "Custom Mode." Select the latter and click the "Continue" button.
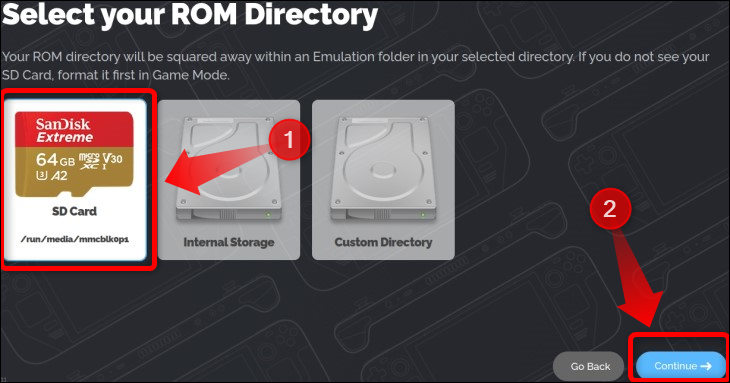
The following window lets you select where you want EmuDeck to create your Emulation folder that includes ROM directories, as well as other folders that store save files, emulator settings, firmware, etc. We recommend using a microSD card, so your ROMs don't take up precious space on your internal storage. You can also hot-swap multiple SD cards and use one for emulation ROMs and another for your Steam games, allowing you to have multiple storage expansions that you can hot-swap seamlessly.
you can hot-swap seamlessly.
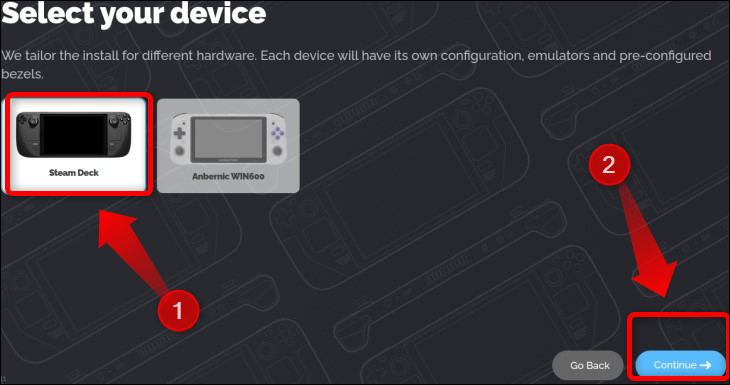
Next, pick the Steam Deck from the list of devices and click the "Continue" button.
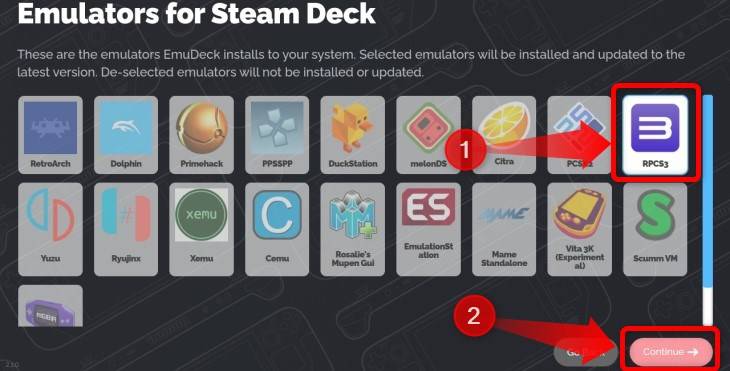
Now, select RPCS3 from the emulator list and click "Continue." You can also install any other emulator you plan on using.
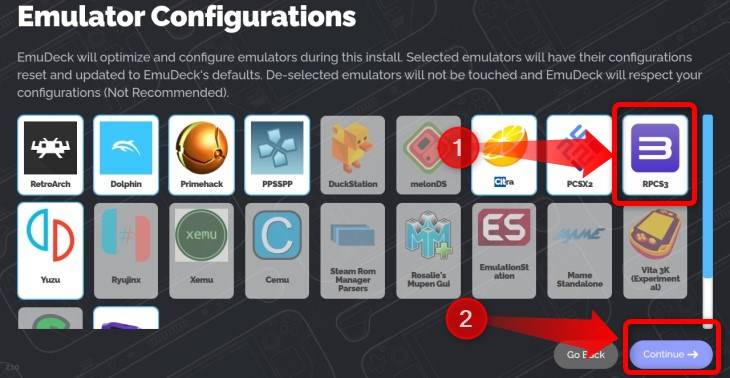
On the following "Emulation Configurations" window, make sure to again select RPCS3 so that EmuDeck can automatically configure the emulator with the Steam Deck optimized settings.
Next, you'll be able to tweak various QoL settings, including enabling auto saves for certain systems, game bezels for games that run in aspect ratios other than 16:9 and 16:10, aspect ratios for certain systems, etc. Tweak those settings to your liking.

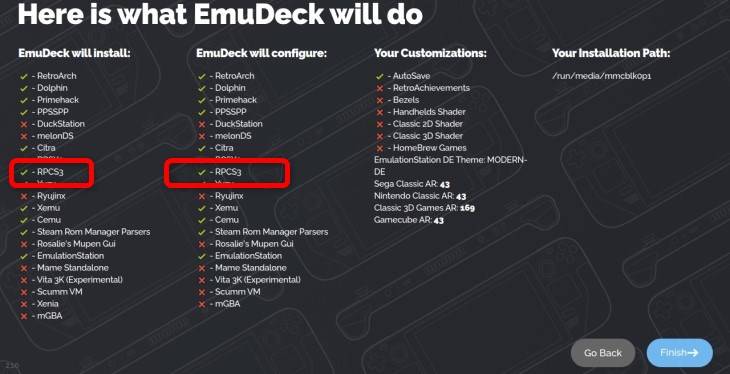
Once you go through every QoL option, EmuDeck will show a window with all of the emulators and emulator configurations you chose to install, your customizations, and the location of the Emulation folder. Check whether you selected RPCS3 for installation and configuration, then click the "Finish" button.
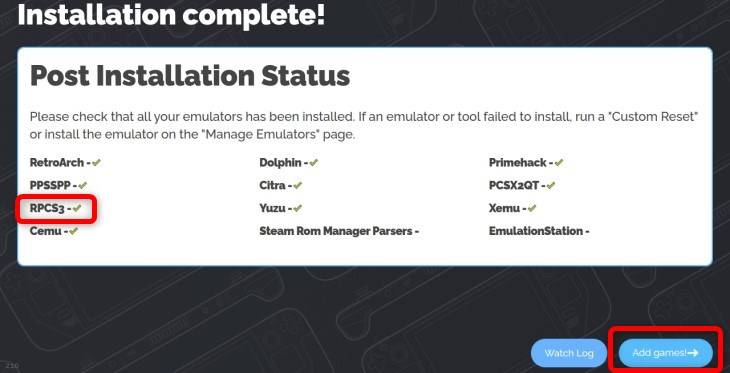
EmuDeck will then install and configure emulators and create the ROMs folder. Once it finishes, it will notify you that the installation is complete. Check whether RPCS3 is on the "Post Installation List" and click the "Add Games!" button.
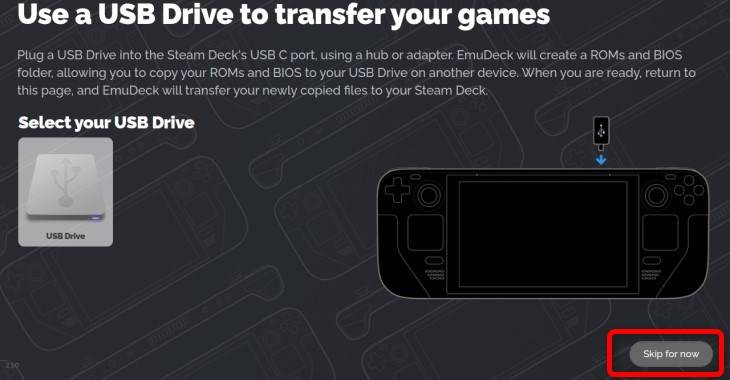
The following window will give you the option to plug a USB flash drive into your Steam Deck and let EmuDeck automatically create ROMs and BIOS folders, but we're going to show you how to add games manually. Click the "Skip For Now" button.
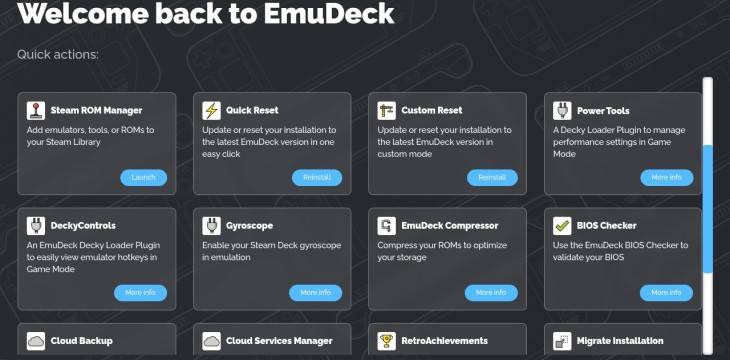
Once you're on the "Welcome Back to EmuDeck" window, close EmuDeck. It's time to show you where to add your PS3 ROMs and how to install PS3 firmware.
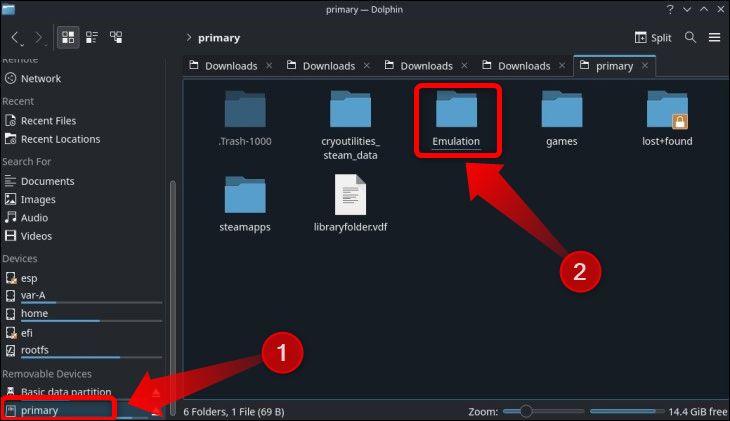
If you created your ROMs folder on your SD card, access the card by scrolling down to the "Removable Devices" tab in the Dolphin file manager. Once there, click the "Primary" tab, and once there, enter the "Emulation" folder.
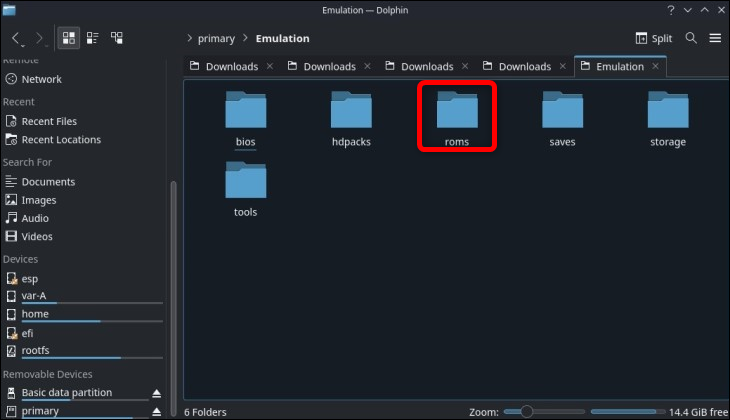
Once inside the "Emulation" folder, enter the "Roms" folder.
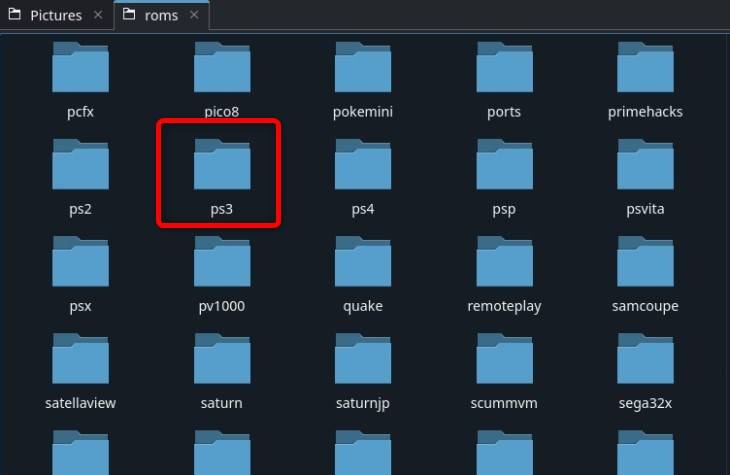
After you enter the "Roms" folder, look for a folder titled "PS3," enter it and copy your ROMs inside it.
Once you copy your games, it's time to install the PS3 firmware. Just follow the instructions you have received on your purchase to download the firmware from our server. Once dsownloaded you are ready to go.
Next, open RPCS3 by clicking the "Application Launcher" button, then the "Games" tab.
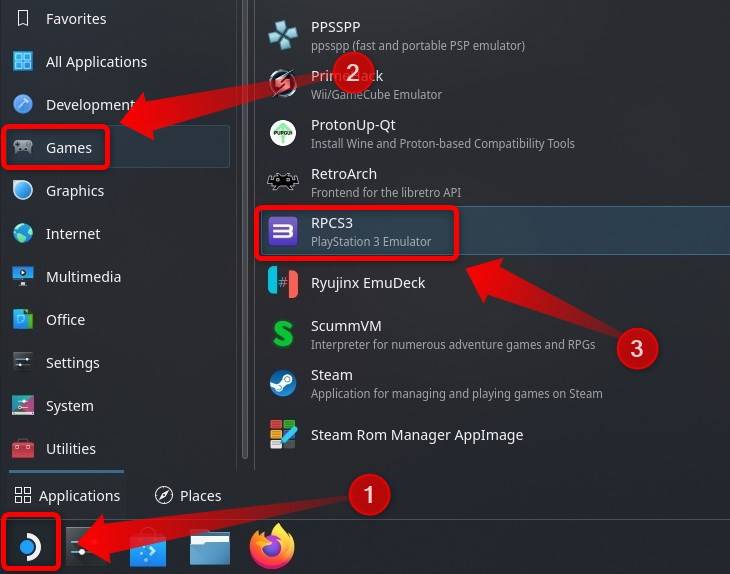
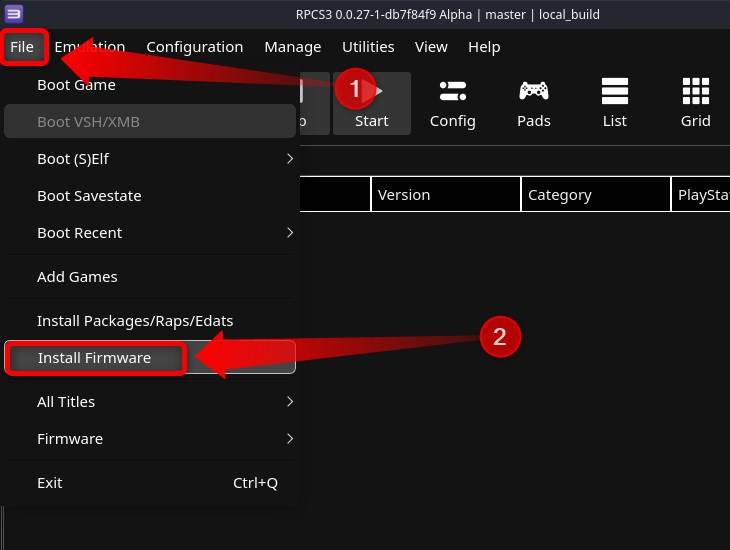
After you open RPCS3, click on File > Install Firmware.
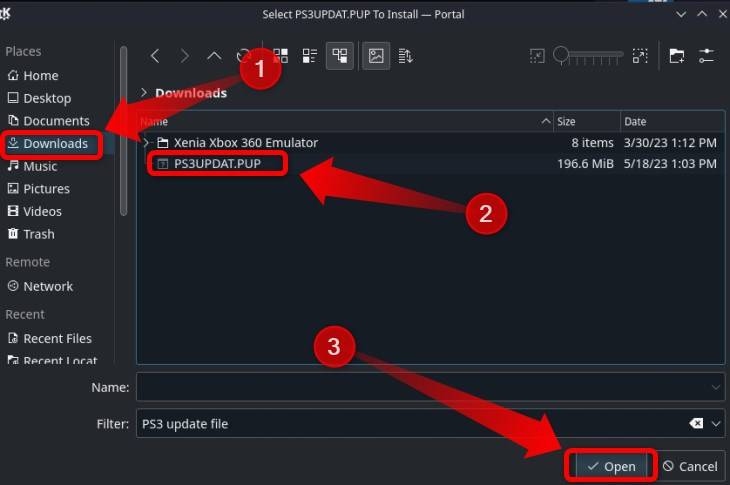
Next, click the "Downloads" tab, select the "PS3UPDAT.PUP" file, and click "Open."
RPCS3 will now install the firmware. A new window will open with "Compiling PPU Modules" shown on it. Wait for the installation to finish, and then close RPCS3. Now it's time to add your PS3 games to Steam with Steam Rom Manager.

NOTE: You must install PKG files in RPCS3 for Steam Rom Manager to recognize and add them to Steam. To install a PKG game, open RPCS3, click File > Install Packages/Raps/Edats, locate the PKG file, open it, and wait for the game to finish installing.
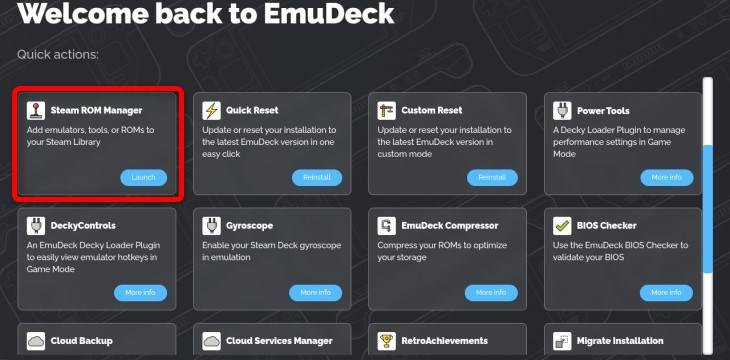
Open EmuDeck and click the "Steam Rom Manager" button on the homepage.
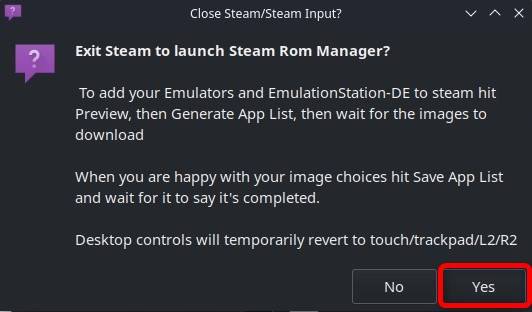
Next, allow Steam Rom Manager to close Steam.
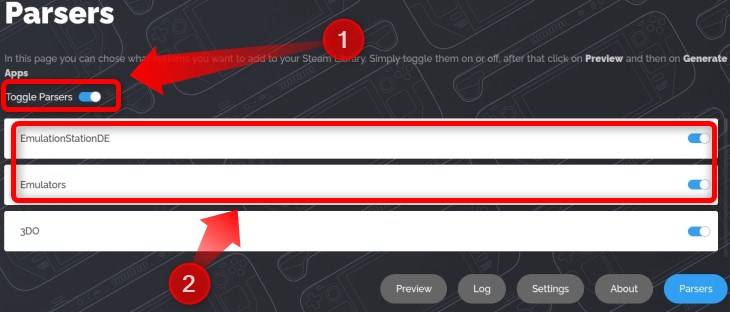
The following window is called Parsers. Once there, click the "Toggle Parsers" toggle to turn off adding games for every single emulator you have installed. Next, enable the "EmulationStationDE" and "Emulators" parsers to use Emulation Station to open emulated games you don't want to add to Steam while in Game Mode and to be able to open RPCS3 when in Game Mode. This way, you don't have to go to Desktop Mode each time you want to tweak RPCS3 settings.
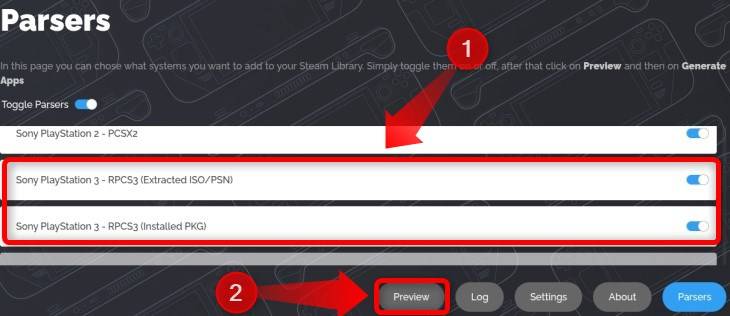
Next, scroll down---disabling Steam will disable left-click with the right trackpad but you can scroll down with your finger since Steam Deck has a touch screen---and enable both PlayStation 3 parsers, as shown below. Then you can click the "Preview" button.
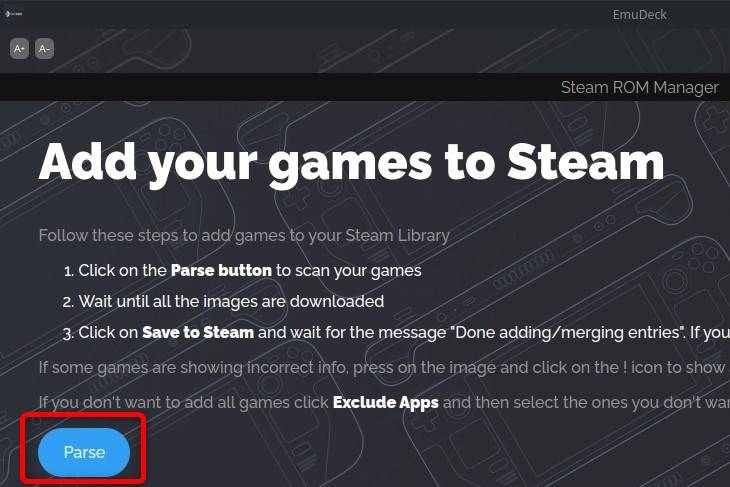
Click the "Parse" button on the following window and wait for Steam Rom Manager to fetch all your games.
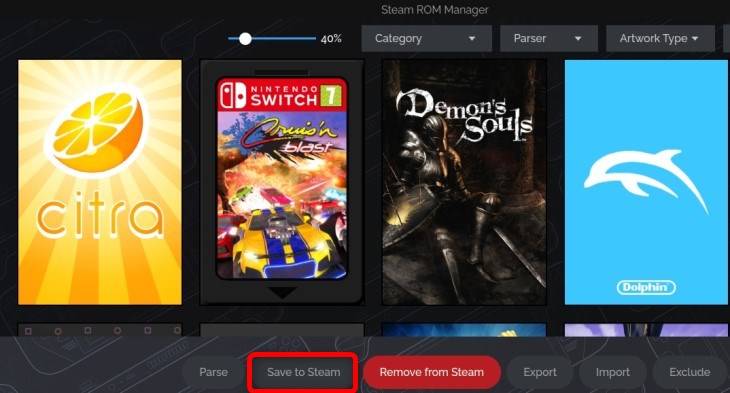
Once Steam Rom Manager lists your games, click the "Save to Steam" button and wait until you see a notification in the upper right corner of the screen that reads "Done Adding/Removing Entries."
Now you can close Steam Rom Manager and open Steam. Select your Steam Library and then click the "Collections" button.
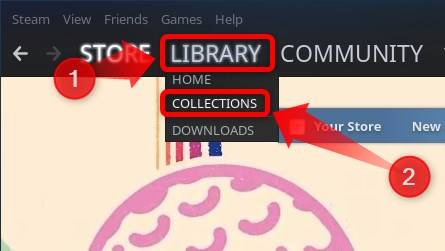
Once there, you should have a collection titled "PS3." if you have it, that's it; you added your PS3 games to Steam!

While some PS3 games work perfectly with default RPCS3 settings, lots of games require custom configs or installing game patches. We recommend you visit the RPCS3 compatibility page and search for each game you want to play to see recommended settings for that particular game.
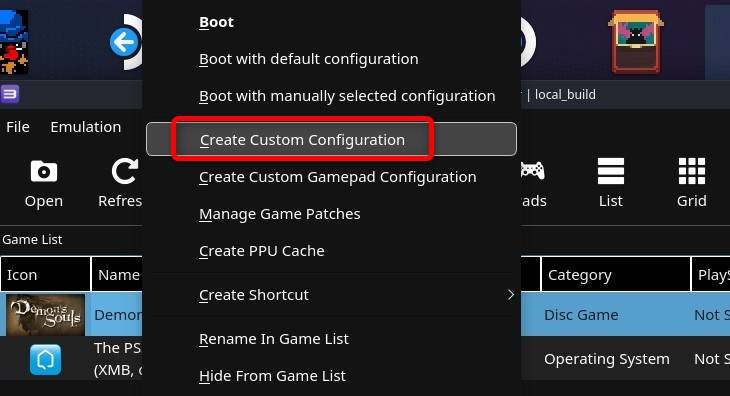
To tweak custom settings for a specific game open RPCS3, select the game you want to tweak, right-click it and then select the "Create Custom Configuration" button.
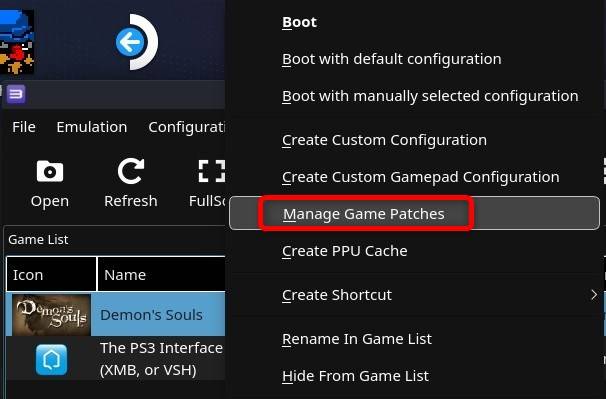
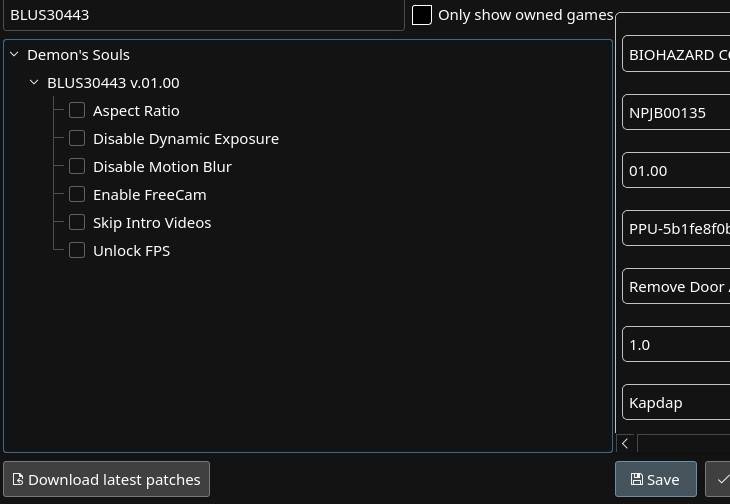
Finally, the most popular PS3 games feature various patches that improve performance, fix bugs, add 60fps mode, etc. To download and enable game patches, select a game, right click it and then click the "Manage Game Patches" button.
Once in the "Game Patches" menu, click the "Download Latest Patches" button and confirm your choice to download every patch available for that particular game.
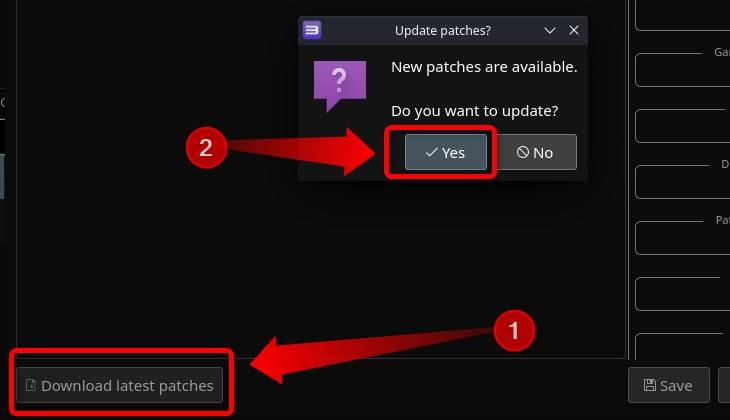
Once RPCS3 downloads patches, you can freely enable or disable individual patches.
Okay, that's about everything you should know about emulating PS3 games on your Steam Deck!
Latest Post: New Content Our newest member: JuiceWillis Recent Posts Unread Posts Tags
Forum Icons: Forum contains no unread posts Forum contains unread posts
Topic Icons: Not Replied Replied Active Hot Sticky Unapproved Solved Private Closed
